
How Wireless Skid Steer Attachment Controls Work
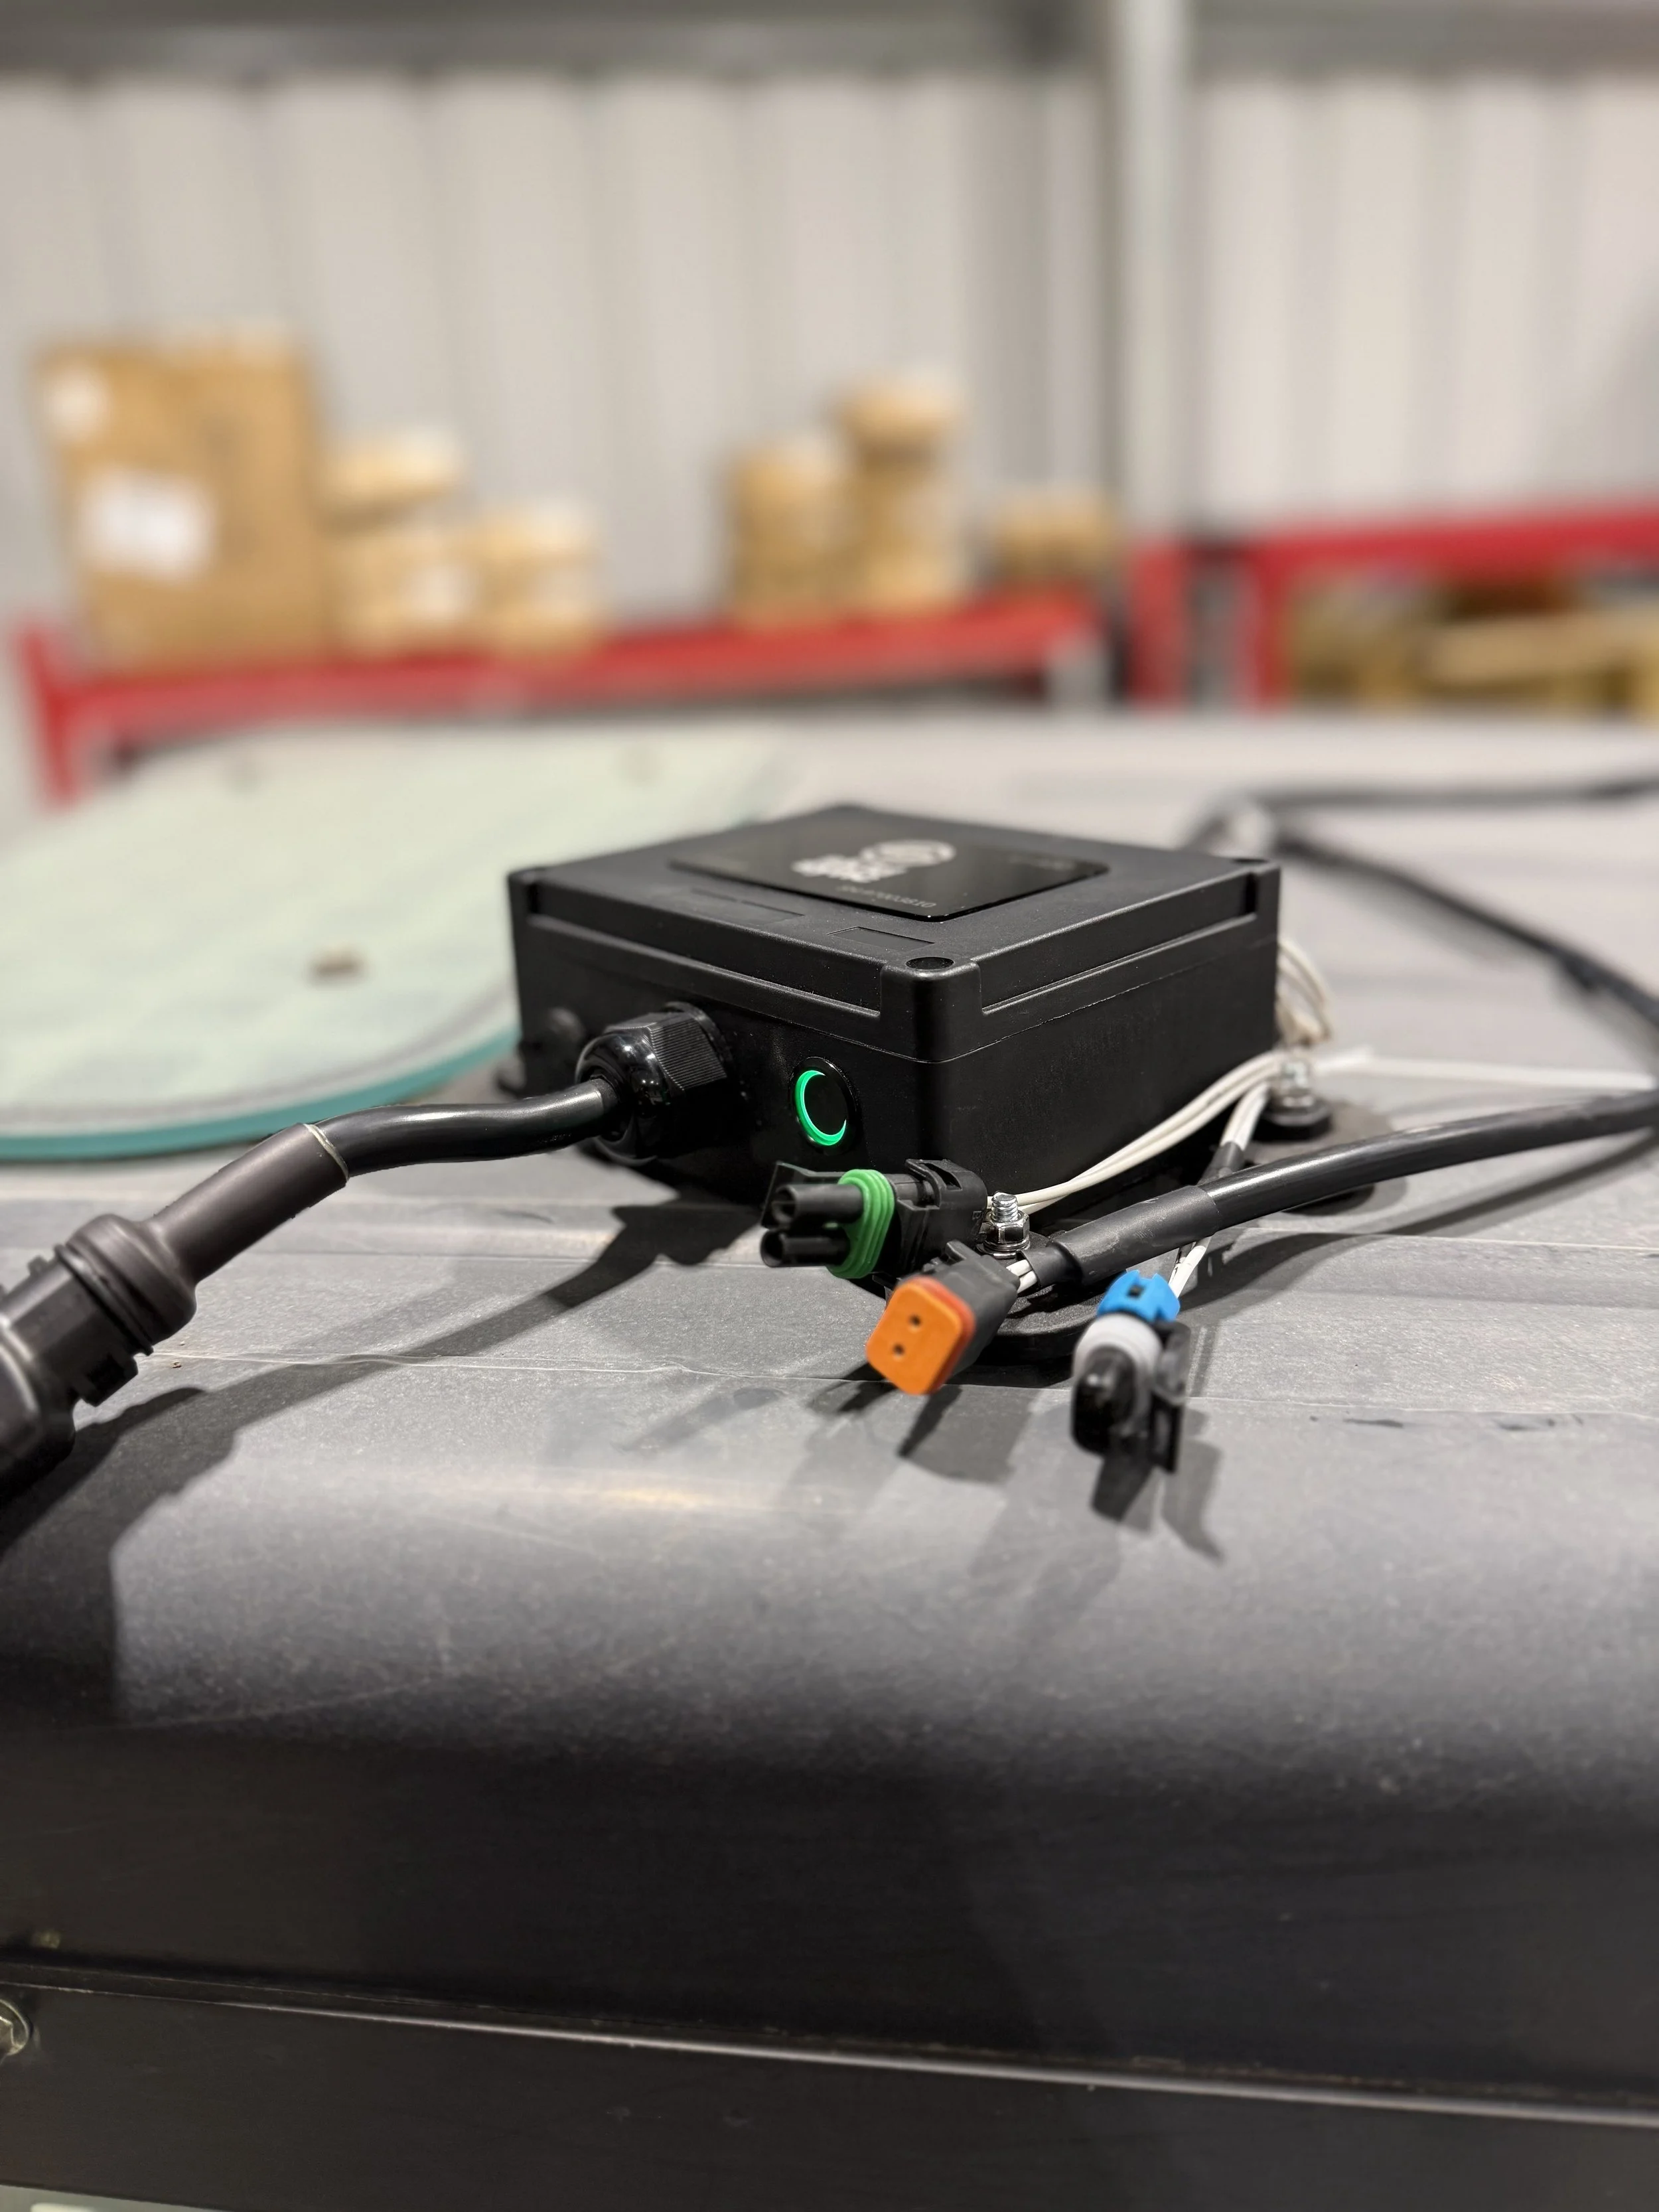
Skid Sync U400 Universal Box
When we tell people that our wireless control system lets them run any attachment on any machine without harnesses or rewiring, we get the same two reactions every time.
Operators who've been fighting with compatibility issues their whole career say: "Wait, that actually works?"
And then: "Okay, but how?"
Fair question. We're not asking you to take anything on faith here. You're spending real money on equipment and you deserve to understand exactly what you're buying. So let's break down how wireless skid steer controls actually work — the technology behind it, why it's reliable, and why we built it this way instead of the traditional wired approach.
The Basic Concept: Cutting the Wire Between Machine and Attachment
Here's the fundamental problem wireless controls solve.
Traditional attachment control requires a physical electrical connection between your skid steer and your attachment. The machine sends signals through a wired connector (14-pin, 7-pin Bobcat, whatever you've got) to the attachment's solenoids, which control the hydraulic functions.
This works fine when everything matches. The problem is it almost never matches.
Wireless controls cut that physical connection entirely. Instead of running signals through a connector between machine and attachment, the system uses radio frequency (RF) communication to send those same signals wirelessly. The machine side and the attachment side talk to each other through the air instead of through a cable.
Simple concept. Surprisingly powerful in practice.
The Two Components: How the System Is Built
Every wireless control system has two main parts. Here's how ours is set up and why.
The Wireless Control Box (Mounts on the Attachment)
This is the brain of the whole operation. The control box is a weatherproof enclosure that contains:
The wireless receiver: Picks up the signal from your handheld remote.
The solenoid driver circuits: Receives signal and sends the right output to the right solenoid
The power management system: Handles battery regulation and power distribution
The quick-connect interface: Where your harness connects
The box mounts directly on the attachment using magnets or mechanical fasteners. It sits right next to the attachment's solenoids, which keeps wire runs short and clean.
One thing that makes our system different: the control box lives on the ATTACHMENT, not in the cab. More on why that matters in a minute.
The Quick-Connect Harness (Stays on the Attachment Permanently)
The harness is a simple wiring loom that connects the control box to the attachment's solenoids. It's custom-configured to match whatever solenoid layout your specific attachment has.
The harness stays permanently mounted on the attachment. You buy one harness per attachment (~$50 each), wire it in once, and you're done. Every time you use that attachment, the harness is already there, ready to connect.
This is the key to the whole system working. Instead of fighting with connector compatibility (7-pin, 14-pin, 8-pin, John Deere proprietary, etc.), we bypass all of that by going directly to the solenoids. Solenoids are solenoids regardless of what brand connector the manufacturer decided to put on the attachment. Direct connection, zero compatibility headaches.
The Wireless Technology: What's Actually Happening
When you press a button in the cab, here's the chain of events that happens in milliseconds:
1. Signal generation Your remote control registers the button press and generates a command: "Activate solenoid circuit 2, forward."
2. RF transmission That command gets encoded and transmitted via radio frequency. We use 2.4GHz frequency — the same spectrum used in industrial automation, medical devices, and mission-critical remote control applications. It's not experimental technology. It's been proven in demanding environments for decades.
3. Signal reception The receiver in the control box on your attachment picks up the transmission. The receiver is continuously listening, so response time is measured in milliseconds — faster than you can perceive any delay.
4. Signal decoding and verification The receiver decodes the signal and verifies it came from the paired transmitter. This is important — the system won't respond to stray RF signals from other equipment on your job site.
5. Solenoid actuation The decoded command goes to the solenoid driver circuit, which sends the appropriate output to the correct solenoid on the attachment. The solenoid activates. Your attachment moves.
Start to finish: under 50 milliseconds. You press the button, the attachment responds. No perceptible lag.
Range and Reliability: What to Expect in the Real World
This is usually the first question we get from operators who are skeptical about wireless: "What happens if the signal drops?"
Let's be straight about it.
Range: Our system operates reliably at 100+ feet. For context, the distance between your cab and an attachment mounted on your machine is maybe 6-8 feet. You've got enormous headroom before range becomes any kind of issue.
Interference: Each remote and box are pre-paired with each other, and operate on unique channels. Even if you had 4 different Skid Sync boxes all working the same job site, they would not interfere with each other.
Fail-safe behavior: If the signal is interrupted for any reason (you drive the machine far from the attachment, battery dies, something blocks the signal), the solenoids default to the OFF position. The attachment stops where it is. Nothing dangerous happens, nothing keeps moving uncontrolled. This is an intentional design decision, not a limitation — it's the safe default behavior for any well-designed remote control system.
Real-world reliability: We're seeing 99.9%+ reliability in normal operating conditions. The honest answer to "what if the signal drops" is: it basically doesn't, but when it does, the system fails safe.
Battery Life and Power Management
The control box on the attachment runs on a rechargeable battery system.
Battery life: Regular attachment use sees a weeks worth of charge. For context, a typical work day is 8-10 hours. You're not going to run out of battery mid-job if you charged it the night before.
Charging: Standard charging via USB or charging port. Takes a few hours to fully charge.
Practical tip: Build it into your routine. At the end of the day, pull the control box off the attachment quick-connect and throw it on the charger. Same as your phone. You never let your phone die because you've built charging into your daily routine — do the same with the control box.
One thing worth noting: since the control box is on the attachment (not in the cab), it's not drawing power from your machine's electrical system. The machine doesn't need any modifications for power delivery. The box is self-contained.
4-Function vs. 6-Function: Which Do You Need?
Our system comes in two versions — 4-function and 6-function. Here's how to know which one you need.
4-Function Control Box: Controls up to 4 independent solenoid circuits. Most common attachments with electronic controls use 2-4 functions. If you're running dozer blades, angle brooms, soil conditioners, or other standard attachments, 4-function handles it.
6-Function Control Box: Controls up to 6 independent solenoid circuits. For more complex attachments with multiple independent functions If your attachment has more than 4 electrically-controlled functions, you want the 6-function box.
When in doubt: Count the solenoids on your attachment. Each independently controlled function needs one circuit. If you've got 5 solenoids that all need to be individually controlled, you need the 6-function box.
How Installation Actually Works
We designed this system so any operator can install it without an electrician. Here's the basic process:
Step 1: Mount the harness on the attachment (one-time, 20-30 minutes per attachment) The quick-connect harness wires directly to your attachment's solenoids. This is a one-time installation per attachment. Once it's done, it's permanent. You don't touch it again.
Step 2: Mount the control box on the attachment (seconds) The control box snaps onto the quick-connect harness. It magnetically or mechanically mounts to the attachment body. Takes about 10 seconds.
Step 3: Pair the system Control box and remote pair to each other automatically with the start button.
After that: Pop the control box on, pop it off, move to the next attachment. The harnesses stay on the attachments. The control box travels with you.
Tools required: Basic hand tools. Nothing exotic. If you can wire a trailer hitch, you can install this system.
Why We Put the Box on the Attachment (Not the Machine)
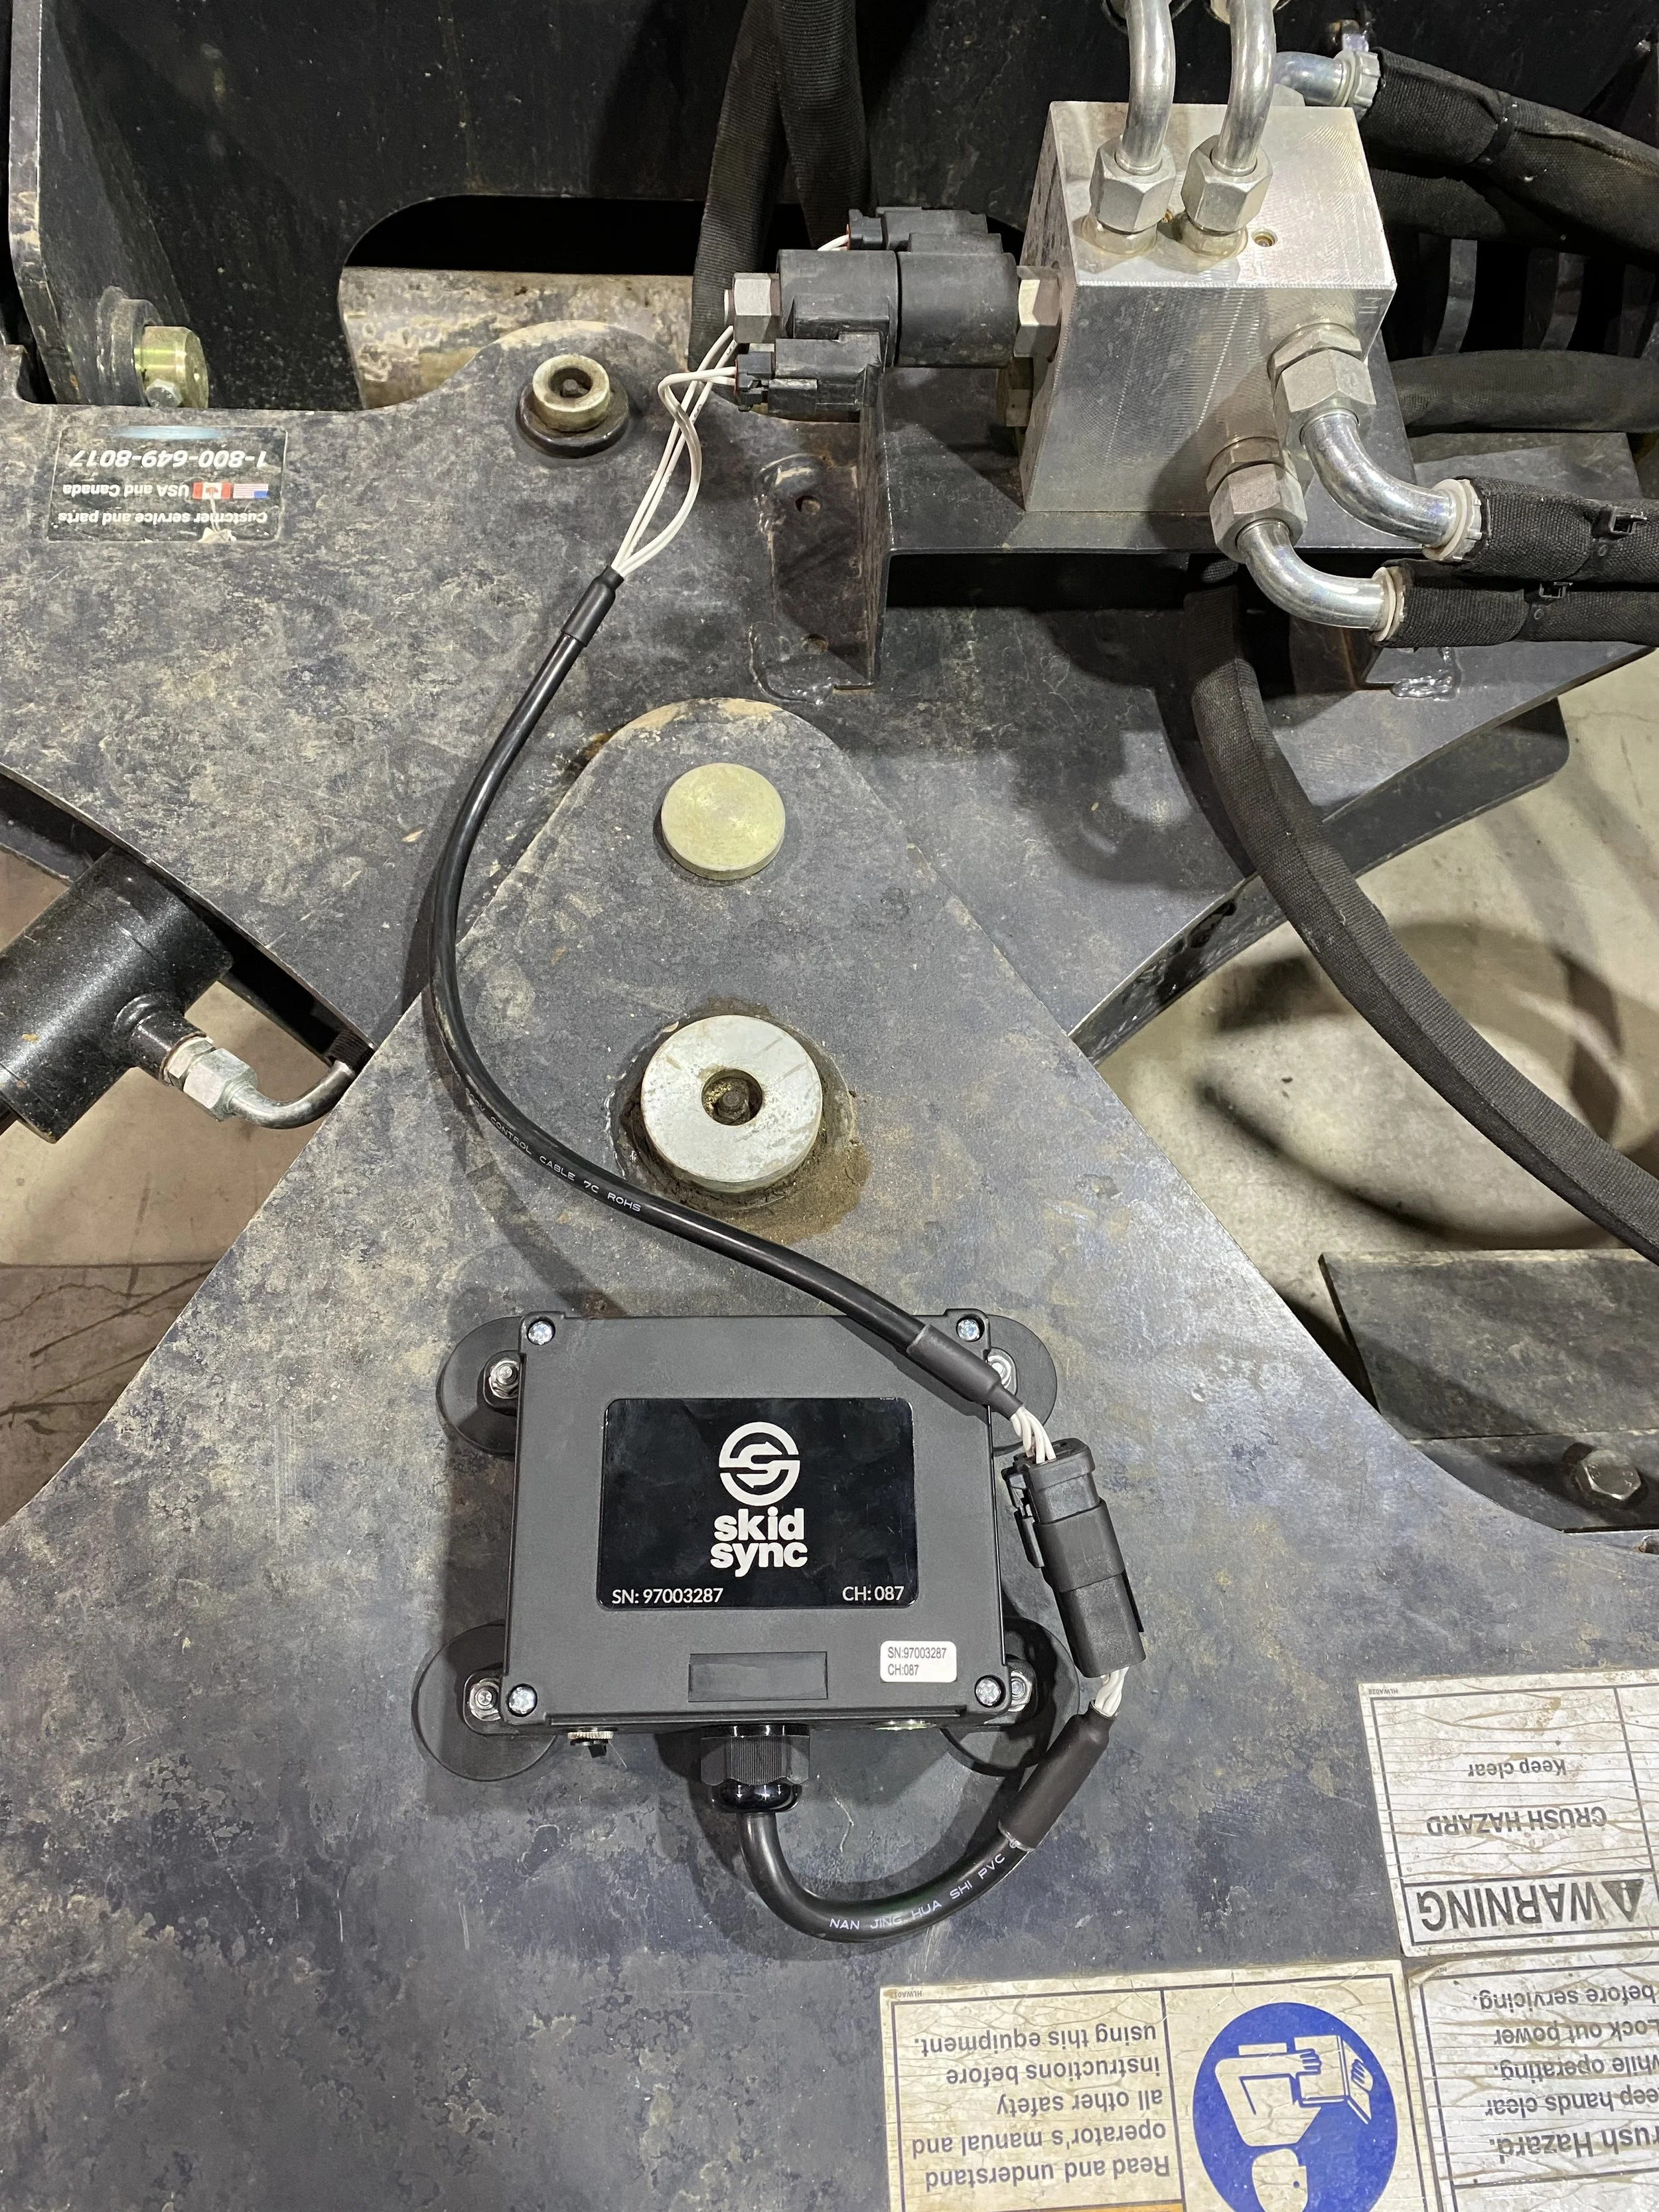
Skid Sync U400 Universal Box on Soil Conditioner
This is the design decision that makes everything else work, and it's worth explaining.
Most people's instinct is to put the controller in the cab. It makes intuitive sense — that's where the operator is, that's where the controls are.
We went the other direction, and here's why.
If the control box is in the cab, you still have a compatibility problem. You still need a physical connection between the machine and the attachment. The controller in the cab has to get its output to the attachment somehow, which means you're back to needing machine-specific harnesses or connectors.
By putting the box on the ATTACHMENT, the machine side becomes dead simple. Any machine with a 12V system (every skid steer ever made) works. Period.
The control box on the attachment connects directly to the attachment's solenoids. No connector compatibility. No machine-specific adapters. Just the box, the harness, and the solenoids.
One box. Any machine. Any attachment. That's only possible because the box lives on the attachment side.
Wireless vs. Wired: The Honest Comparison
We're obviously not unbiased here, but let's give wired systems their fair due.
Where wired wins:
Zero battery management required
No RF interference possible (though practically speaking, this is almost never an issue)
Potentially simpler for single-machine, single-attachment dedicated setups
Lower upfront cost for very simple one-attachment situations
Where wireless wins:
Universal machine compatibility (no connector matching)
No physical connection between machine and attachment
10-second attachment changes vs. 5-10 minutes for harness swapping
One system works across unlimited machines and attachments
No cable wear, damage, or failure points between machine and attachment
Scales economically — cost barely increases as fleet grows
No modification to machine's electrical system required
The bottom line: If you've got one machine and one attachment that match perfectly and you never swap anything, wired is fine. The moment you have multiple attachments, multiple machines, or any cross-brand compatibility issues, wireless wins on every metric that matters.
Is Wireless Actually Reliable Enough for Professional Use?
We get it. Wireless sounds like it might be less reliable than a hard wire. That's a reasonable initial instinct.
Here's the context that changes the calculation:
The 2.4GHz RF technology we use is the same technology running industrial robotics, medical equipment, military applications, and other environments where failure is not an option. It's mature, proven technology.
The failure modes that DO exist with wireless (battery, RF interference) are manageable and fail safe. The failure modes with wired systems (connector damage, harness wear, corrosion, broken pins, wrong plug) are common, annoying, and often happen at the worst possible time.
We've been running these systems in real working conditions — mud, dust, vibration, temperature swings, job sites with every kind of RF environment — and the reliability has been excellent.
If you're skeptical, we understand. The best way to get comfortable with it is to see it work. That's why we offer evaluation units for serious buyers. Try it in your operation. The technology speaks for itself.
What This Means for OEMs and Manufacturers
If you're an attachment manufacturer reading this, here's why this matters to your business.
Universal harnesses are the current standard solution for shipping attachments that work across different machines. They're expensive, they require inventory management across different connector types, and your customers still run into compatibility issues half the time.
A wireless control system bundled with your attachment changes the conversation entirely. Your attachment works on any machine, out of the box, every time. No compatibility questions at the dealer. No warranty claims from wiring issues. No customer frustration from incompatible connectors.
One part number. Universal compatibility. Premium positioning.
The economics make sense at scale, and the customer experience improvement is significant. If you're interested in what a partnership looks like, we're open to that conversation.
The Bottom Line
Wireless skid steer controls work by replacing the physical electrical connection between machine and attachment with a reliable RF link. The control box lives on the attachment, connects directly to solenoids, and communicates wirelessly.
The result: any attachment, any machine, zero compatibility headaches.
We built Skid Sync because we were tired of the wiring nightmare ourselves. The technology isn't magic — it's straightforward engineering applied to a problem that's been frustrating operators for years.
It works. And once you use it, going back to harnesses and adapters feels like going back to dial-up internet.
Ready to see it in action? Check out our 4-function and 6-function wireless control systems and see if it's the right fit for your operation.
Still got questions? Reach out. We've probably dealt with your exact setup before and we're happy to talk through it.
Shop Wireless Control Systems | Download Free Compatibility Matrix | Contact Us